Edit and add entries

Last update:
5/8/2025
API
app
Web
Before you start

To create new entries or change existing entries, you need a login. This is important so that we can understand your changes and provide you with optimal support when needed.

note

If you've never created an entry before and feel uncertain, you can switch to the test environment. You can find out how to do this in the “Getting Started” guide.

Professional tip

You can correct your information yourself in the app at any time. If you have major problems, contact us at support@ginto.guide so that we can roll back the wrongly entered changes.

That's what you'll find in this guide:

Frequently asked questions

Add entry

#
1
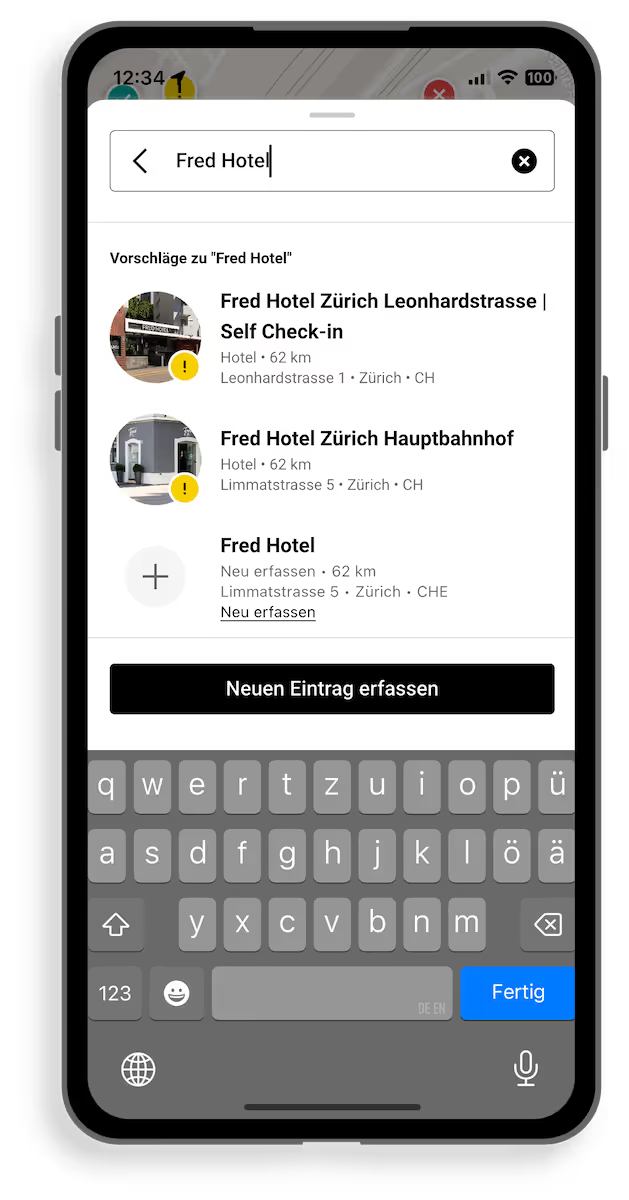
  1. Click on the plus icon next to the search bar to add a new entry.
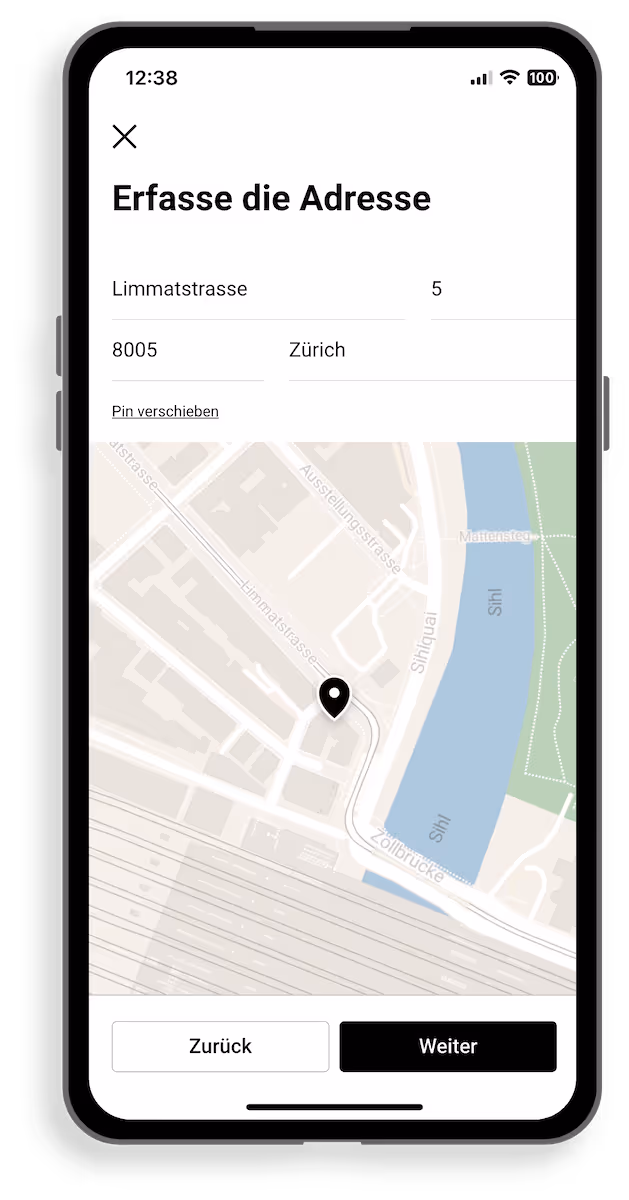
  2. In the search field, enter the name of the location that you want to enter.
  3. Select the appropriate entry from the list of suggestions by clicking on it.
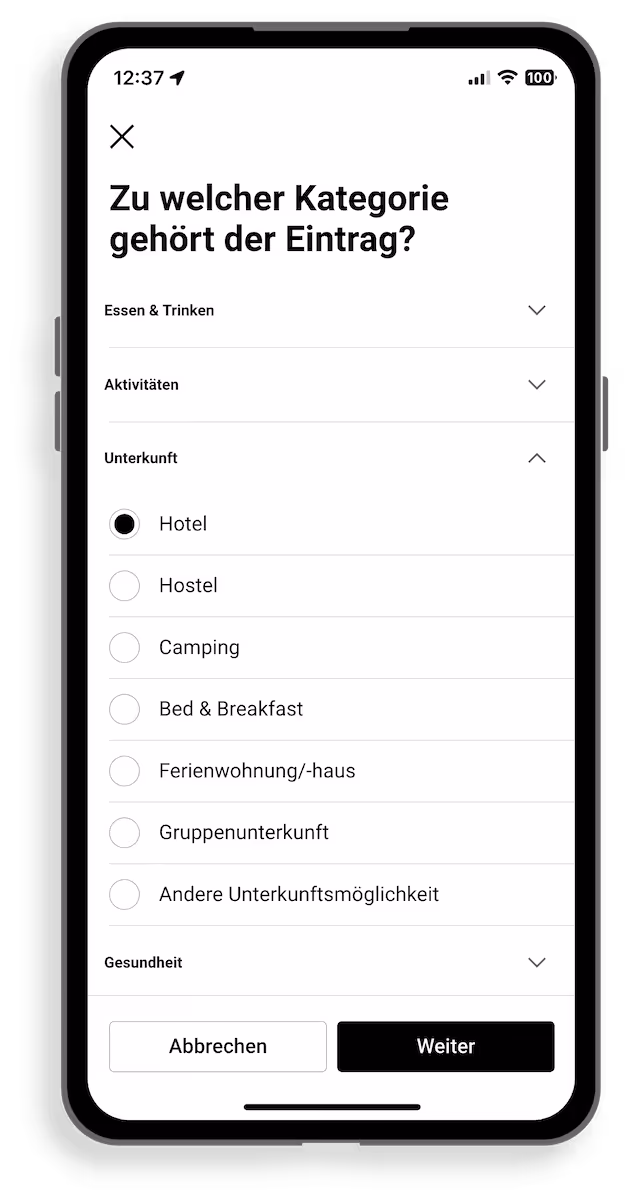
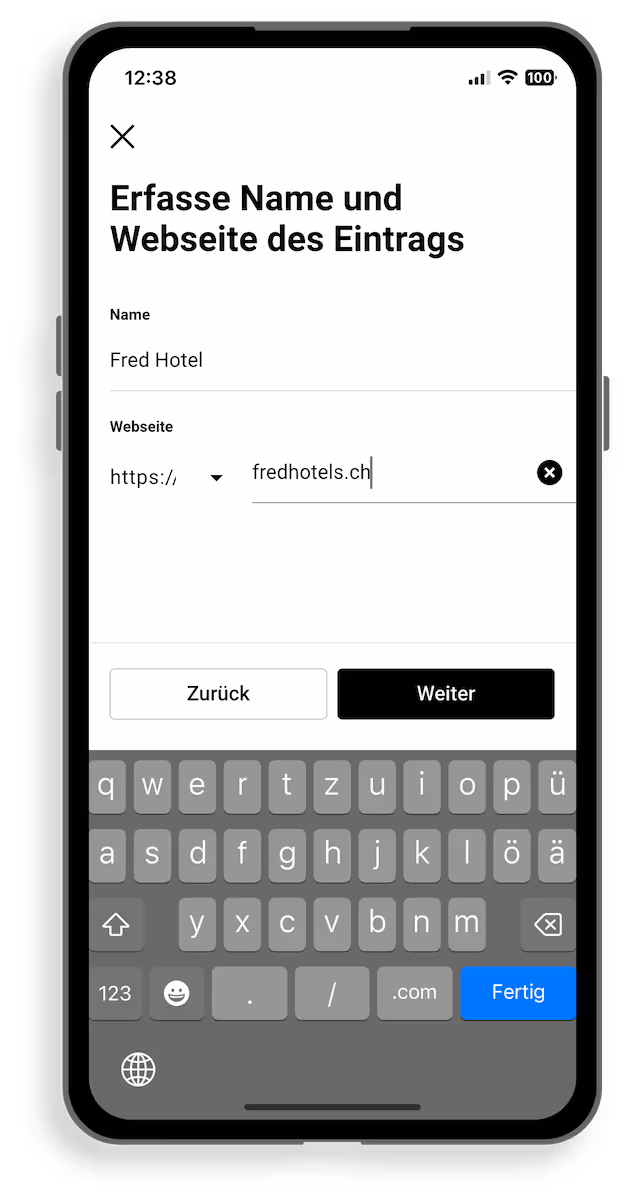
  4. If there isn't an entry yet, click the “Create a new entry” button.
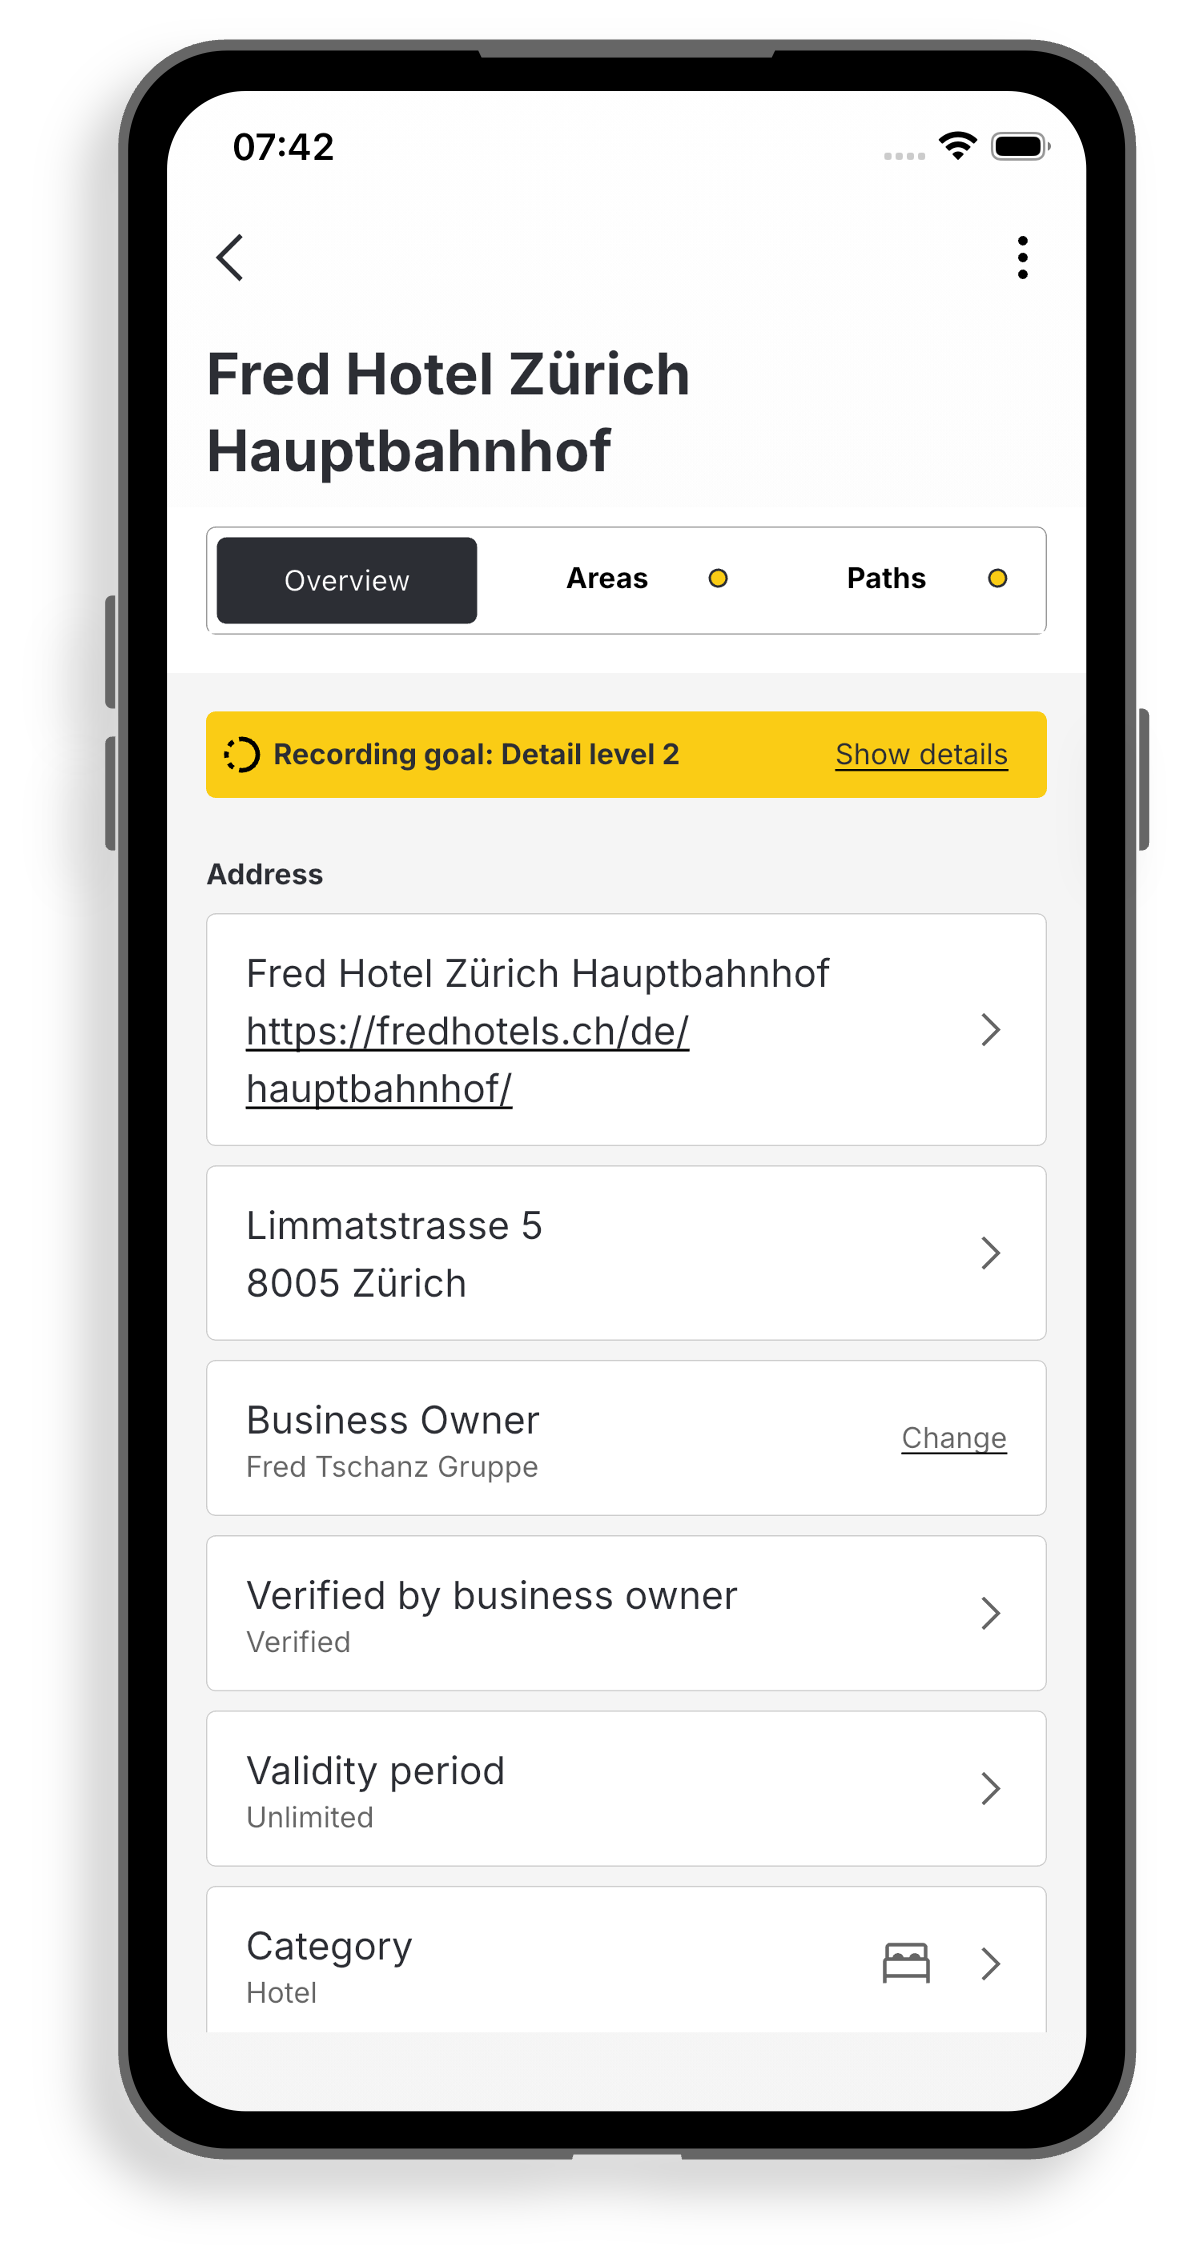
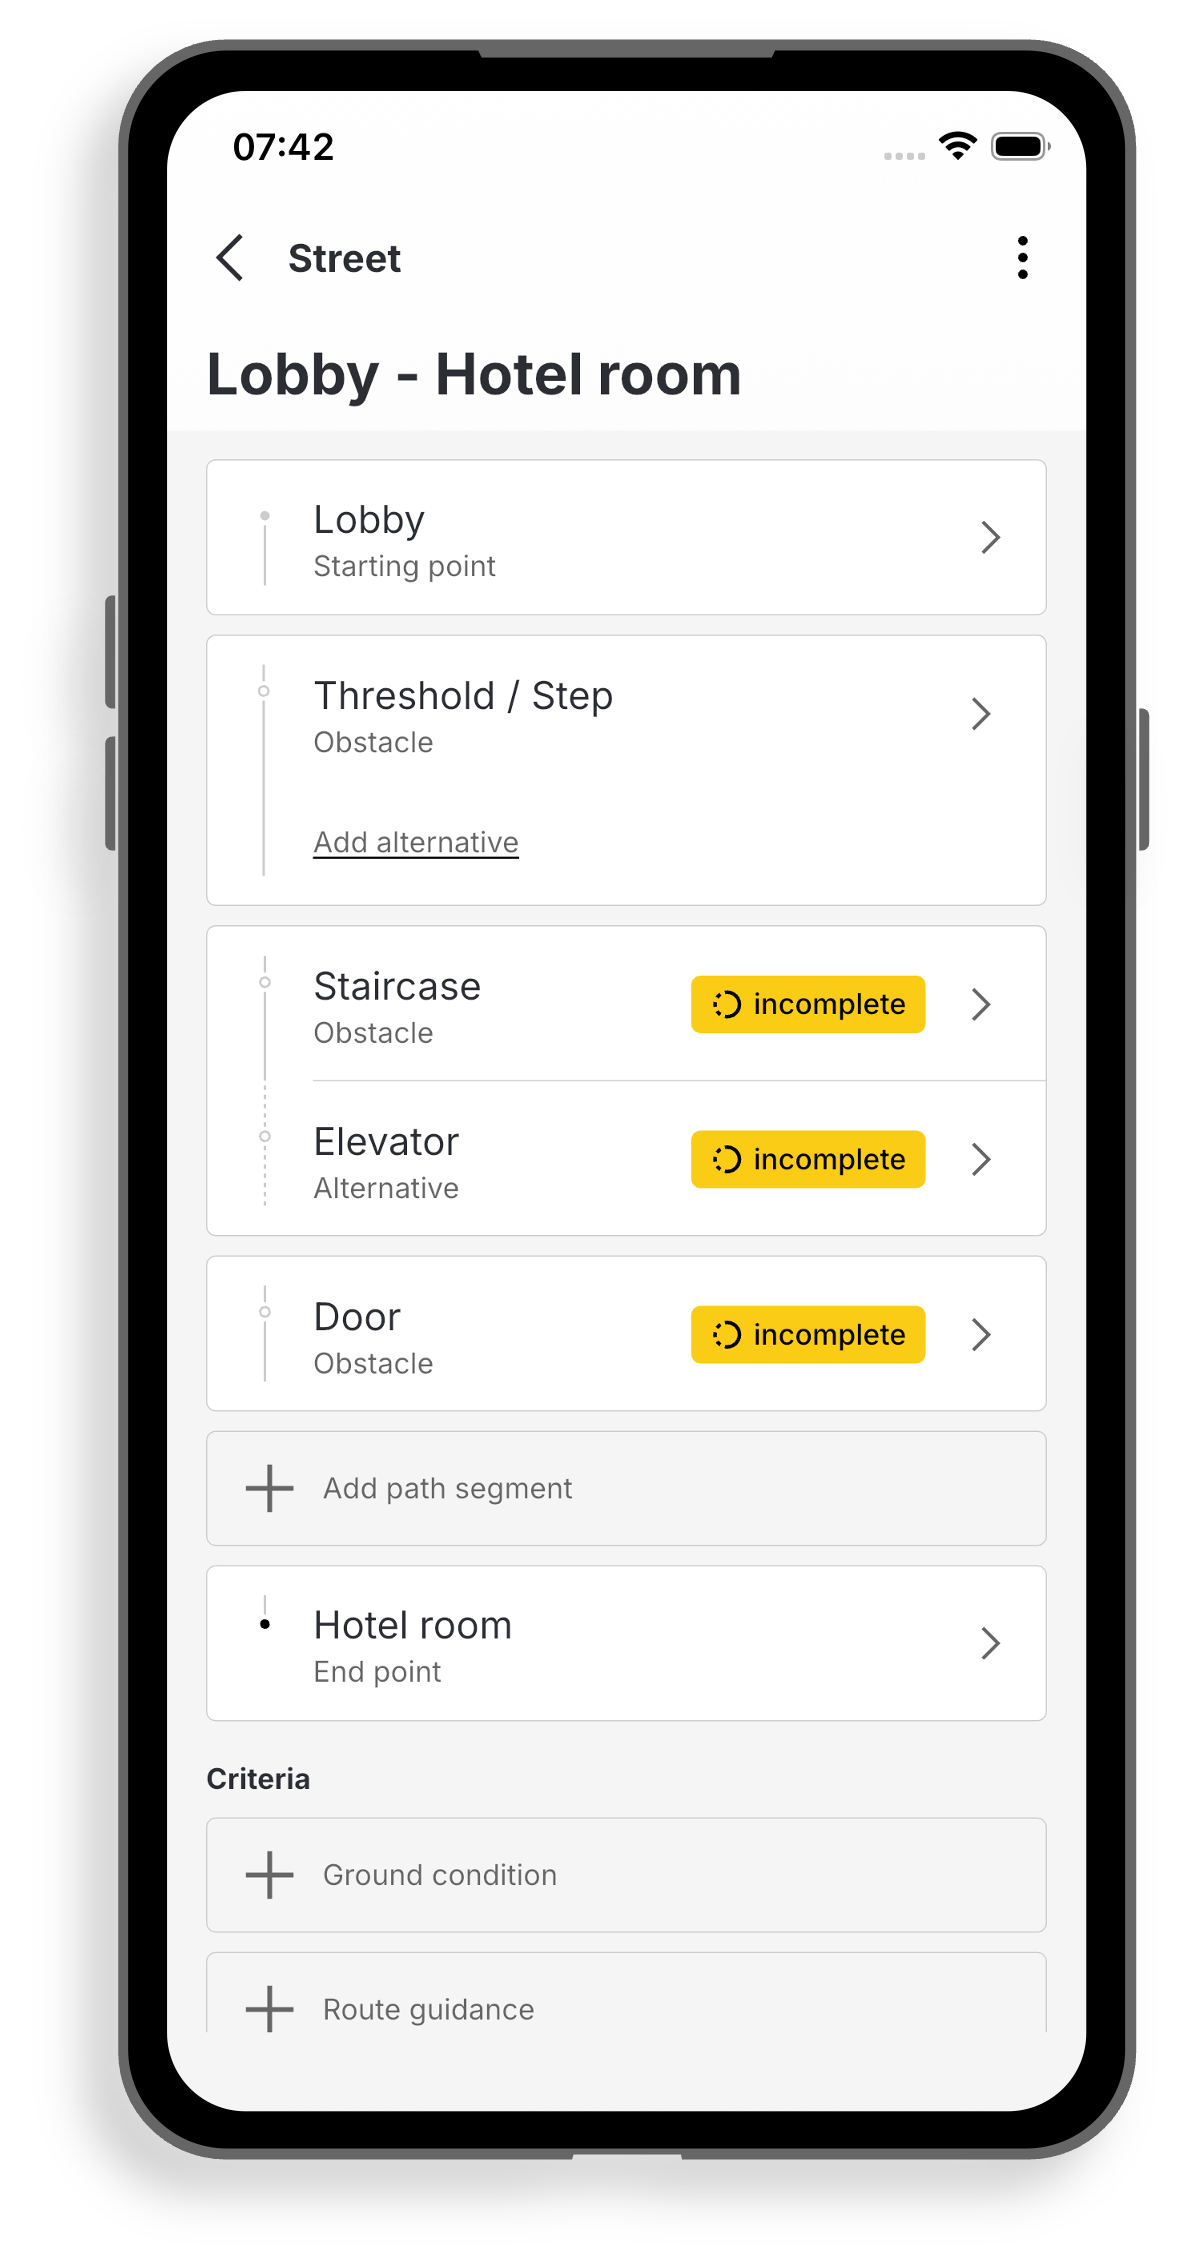
All entries you have added can be found in the menu under “Edited Entries.” When the entry is completed, all information is published directly.

Edit entry

#
2
  1. Start Ginto and find the entry you'd like to edit.
  2. Click on the icon at the top right to enter edit mode.
  3. Alternatively, you can scroll all the way down and click “Edit entry.”
  4. Now you can add, correct, or delete information, just as you would when creating a new entry.

All entries you have edited can be found in the menu under “Edited Entries.” As with Wikipedia, all users can edit all entries. Only change entries if you are sure. When you make changes to a listing, the people who created the listing are notified. You can then accept or reject the changes.

Select a category

#
3
  1. Find the category that best suits the location.
  2. Click “Next.”

Only one category can be selected per entry. For example, if you list a hotel with a restaurant and a swimming pool, select the “Hotel” category.

Levels of detail

#
4
  1. By clicking on “View Details,” you'll get an overview of the available levels of detail and the information you need in each case.
  2. In the “Overview” tab, select the desired level of detail.
  3. The yellow fields and dots in the entry masks show you what information is still required to reach the set level of detail.

You can start with level 1 and then work your way up to the highest level of detail. But you can also start right away with the highest level. The more detailed the information, the more useful your entry is.

Add name and website

#
4
  1. Enter the name of the location.
  2. Select whether the website starts with http://or https://
  3. Enter the web address (without http://or https://)
  4. Click “Next.”

Enter address

#
5
  1. Enter the address of the location in the appropriate fields.
  2. Ginto creates a suggestion based on your information.
  3. Select the correct address from the drop-down list.
  4. Click “Capture without an address” or “Move pin” to place the pin in the right place on the map.
  5. Click “Next.”

The overview page

#
6
  1. Enter the location's address. If there is no address, you can manually navigate to a point (PIN) on the map.
  2. If a location is only available for a limited time, such as a pop-up restaurant or a fan zone at events, you can specify the appropriate period under “Validity period.”
  3. Select the category that best suits the location. On this basis, Ginto makes suitable suggestions for recording areas and accessibility criteria.
  4. If a location offers special offers for people with disabilities, you can select them in the “Offers” section and enter further detailed information about them.
  5. Add a few overview images. These help users recognize that they have found the right location. You can set one of the images as the cover photo for your post.

You are now ready to record areas and paths.

Temporary entries

#
7
  1. In the “Overview” tab, click on “Validity period.”
  2. Turn on the switch for the limited period of time.
  3. Enter the start and end dates.
  4. Click “Accept.”

Users of Ginto can now also see that this location is a temporary facility so that they can prepare accordingly for an event. After the end date has passed, the entry will no longer be displayed in the search for users. In capture mode, however, it remains available in case you want to reactivate it for a recurring event with a new date.

Bilder hinzufügen

#
8
  1. Klicke auf «Bild hinzufügen».
  2. Nun kannst du entweder mit der Kamera ein Bild direkt aufnehmen oder eines aus der Galerie hochladen. Achtung: Bilder, die du direkt in der App aufnimmst, werden nicht automatisch in deiner Galerie gespeichert. Du kannst sie später nicht noch einmal verwenden.
  3. Über die drei weissen Punkte im Bild kannst du dieses als Titelbild festlegen oder löschen.

Achte bei der Aufnahme von Fotos darauf, dass Informationen zur Zugänglichkeit wie beispielsweise Raumverhältnisse, Hindernisse und Hilfsmittel erkennbar sind. Vermeide generische Marketingbilder, zum Beispiel von Essen oder Tieren. Beschränke dich auf ein gutes Bild pro Situation, damit die Einträge für die Ginto-Nutzer:innen übersichtlich bleiben.

Ginto verzichtet bewusst auf umfangreiche Bildbearbeitungsfunktionen. Verwende dazu eine separate Bildbearbeitungs-App. Anschliessend kannst du die Bilder aus der Galerie an die richtige Stelle in Ginto laden.

Capture areas

#
9
  1. Depending on the chosen category of location (for example “hotel”), Ginto makes suggestions for typical areas such as toilets, lobbies or hotel rooms.
  2. If you want to add more areas, click on “Add area” under the preselection and select more areas. Click “Add.”
  3. Now enter the accessibility information for each area by clicking on the respective area and entering the information that Ginto requires of you.
  4. Using the three dots at the top right, you can delete an area, rename it, or add a sub-area.

Our tip: Before entering individual accessibility information, get an overview of the premises. This ensures that no important areas are forgotten.

For example, a sub-area can be an additional room in an area, such as the balcony of a hotel room. In larger buildings, an area can also be created as a floor, with the areas per floor then defined as sub-areas.

Capture routes

#
10
  1. Routes can be entered using the “Routes” menu selection. Ginto gives you initial suggestions for this. Manually add all required routes by clicking on “Add route.”
  2. Select the start and end points of the trail.
  3. Click on the newly created trail and then click “Add trail section.” Here you can now individually add each path element along a path from start to end point. Be careful not to omit any path element.
  4. Record the details for each path element in accordance with the guidelines in Ginto. Click “Add” to save the information.
  5. Under “Criteria,” you can add information that is relevant for the entire journey.

Using the three dots at the top right, you can delete a path or an individual path element and edit the order of the path elements.

For certain path elements, such as a staircase, alternative path elements, such as a lift, can be entered directly under “Add alternative” (instead of “Add route section”).

Our tip: Go down a path and record every path element as it is to ensure that nothing is forgotten. GINTO users decide for themselves whether a path is barrier-free or not based on your objective information.

Capture details

#
11

Make sure you record all information and metrics accurately. For people with disabilities, for example, it is crucial that the door width is measured correctly.

Our tip: The fastest way to collect accessibility information is with Ginto for two. One person installs the Ginto app and enters the information, while the other person picks up a measuring tape and misses the necessary information.

plausibility check

#
13

Infobox with help

#
14
  1. Step 2
  2. Step 3
  3. Step 4
  4. Step 5

Conditional criteria

#
15
  1. Step 2
  2. Step 3
  3. Step 4
  4. Step 5

Frequently asked questions

How can I measure the slope?

The easiest way is to install a water level app. On the iPhone, the spirit level can be used in the “tape measure” app. This app is installed on the iPhone by default. If the app shows the slope in degrees, it must be converted into a percentage. There are various free online calculators for this purpose. Without a spirit level, the slope can be calculated as a percentage by dividing the difference in height by the horizontal distance and multiplying the result by 100.

Can I create a survey with Ginto based on building or space plans?

In principle yes, but on-site recording is clearly preferable to recording according to plans. This is not only more fun, but also makes sense, as the local situation often deviates from plans. For example, not all furnishings are visible on the plans. In addition, important information, such as the height of the control elements in the lift, can only be found on detailed drawings. In addition, it is likely to be a challenge for most people to interpret construction plans correctly. The incidence of errors when recording on the basis of plans is therefore comparatively high.

Why isn't my location shown when I try to add it?

If you want to add a new entry, Ginto automatically suggests locations in your area that match the text you entered in the search field. The suggestions are based on entries in the maps on OpenStreetMap. It may happen that Ginto does not make a suitable suggestion, for example if the spelling is different or the location is not entered in OpenStreetMap. In this case, simply click on the “Create an entry” button at the bottom of the screen. This allows you to create a completely new entry.

I have completed all required fields, why is my entry still shown as incomplete?

This question concerns users with a company account.

For a company entry to be marked as complete, two conditions must be met:

  1. All mandatory fields must be completed completely.
  2. A company account must assign the entry to itself.

To mark an entry as complete, proceed as follows:

  • Log in with your company account.
  • Fill out all mandatory fields for your company, mandatory fields are marked in yellow.
  • Assign your listing to yourself.
Can I edit images in Ginto?

Ginto deliberately dispenses with extensive image processing functions. Use a separate photo editing app and then load the images from the gallery to the right place in Ginto. Images can be deleted individually via the three dots, each shown at the top right).

Do I also have to record moving objects?

Moving objects such as trash cans should be ignored and not captured. They could be somewhere else the next time they visit.

When should I create an entry and when should I create an area within a listing?

There is no conclusive answer to this question.

In the case of a theatre building with several halls, a restaurant and cloakrooms, it definitely makes sense to create an overall entry with areas and sub-areas. Because here, it is important for users to know whether the building can be entered at all and how to get from the individual rooms to the cloakroom or the restaurant.

However, in the case of a hotel complex with several independent restaurants in different buildings, it may be useful to record them individually. However, if the restaurant is an integral part of the hotel, it should be included as an area of the hotel. In principle, a separate entry should be created for each company that is marketed separately.

Is it possible to add comments using an empty text box?

No, this option was deliberately not created. The aim of Ginto is to collect information about the accessibility of locations as objectively as possible. This makes it possible to automatically calculate accessibility for various needs and avoid subjective assessments.

Can I copy information?

This is not yet possible. However, the feature is planned for the future.

You might also be interested in this